Quantcast
Channel: Do Lally Crafts
Viewing all 187 articles
Browse latest View live

A simple thank you

$
0
0

Karin - Thanks
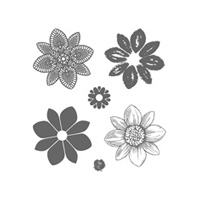
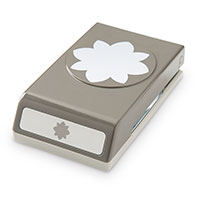
I have been hanging out for this punch and stamp bundle – forever!!!

I finally received it this weekend, just in time to create a thank you card for another friend. This card is very appropriate for the friend as she is into quilting in a HUGE way.

The colours are all from the Subtles range from Stampin’ Up! Some of the hexagons are stamped with the Six-Sided Sampler stamp set, and some are just punched (using the hexagon punch) from the Subtles range of DSP. The small flowers have been punch with the flower from the Itty Bitty Accents set of punches.

I hope she likes this card, when she receives it later in the week,

Cheers,
Karen :)


Wedding Cards

$
0
0

Pauline - Wedding CongratsA friend texted and asked for five wedding cards for her clients, thankfully none of the clients know each other so it meant I could make all of the cards look alike.  This is the result.

Plain white cards stock for the base, red metallic paper for the matt and then plain white card again for the front, which was embossed through the big shot, and then the heat punched out with a die-cut heart.

Thin (6mm) red satin ribbon threaded through a miniature rhinestone heart was placed across the top of the card, and adhered with glue dots so it stands in place.

The base card was sent through the printer for the greeting on the front. My friend likes all her clients cards to be personalised, so each couples names were placed below the Congratulations.

Fonts used were: Californian (Congrats) and Annabelle (names)

Inside was a slip of paper with a small wedding verse on it.

Not Stampin’ Up! supplies but lovely none the less.

Cheers
Karen :)

Talking Pinterest & Sketch ideas!

$
0
0
studiocalico-blog-2014-3-9-sunday-sketch-tracy

Sketch from Tracy @ Studio Calico – accessed on Pinterest

Pinterest is a great place for inspiration. Especially when it comes to garnering sketch collections to make your cards from. In the photos below you can see the cards I made using this sketch, Tracey put up on Studio Calico, as the base idea.

Suitable for male or female cards, sympathy, birthday, wedding, engagement – the sketch is the basis you start with – the creation is your own. Papers, pads, ephemera – get creative.

If you don’t have a Pinterest account yet, I encourage you to get one. Once it’s set up, in the search bar type ‘card sketches’ and browse and pin from the THOUSANDS of sketches some generous people have put up there.

I’d love to see your creations too, so feel free to post them here to show me you sketch and then your creation!

Stay tuned for later this weekend and the special offer I will be putting up!

Cheers,
Karen


My Takes

       ladies-studiocalico-sketch          mens-studio-calico-sketch

Playing with Paper

$
0
0

It’s been a while since I played around with DSP on my cards, so yesterday, I relaxed and played around a little with some of the new DSP I ordered in last week.

These are the cards I came up with:

hapbir

hbloomday

tu

The Happy Birthday card is made with Whisper White and Strawberry Slush, and some added pearls for interest.  I love the background DSP on this card, with the four different flower punches as the focal point.

On the central Blooming Birthday card, the focal point was created using an embossing folder, but the blue background matt was a piece of Whisper White that I sponged with Night of Navy, as I didn’t have any of that cardstock available.

I also stamped the butterfly in Strawberry Slush on both the embossed paper and a piece of scrap, to give the butterfly some added dimension.

The final card, Thank U, used the A Round Array stamp set as the centre of the flower. I love the colours in the paper used, Cheerful Treat, it’s such a shame that this paper has been discontinued. I like the clean look to it, on the crisp Whisper White background.

Almost the end of 2014

$
0
0

Christmas GiveawayI haven’t been on my blog in F O R E V E R or so it seems.  Back in October was my last post, but that’s not to say I haven’t been busy – probably too busy if the truth be known.

I have been busy with personal /stuff/ but also making invitations for a friends wedding, invitations for an engagement, and samples for another wedding that will be in late 2015.  Also there were many Christmas cards I was creating, but never actually sent. *sad face*

Life frequently gets in the way, and it has this year.

I am currently spending some time with my eldest daughter, helping her set up her blog and FB page, down I Gippsland, so I am not even able to take photo’s of all the latest creations *really sad face*.  But I will when I get home to Mornington again this week.

I will also have some new and exciting additions to both my blog and in real life over the coming weeks, so PLEASE stay tuned!!!

Here is a video I uploaded to YouTube a couple of weeks ago.

For those interested in seeing my daughter Melanie’s blog:

http://stampinsanityau.wordpress.com

Well, until next time,
Cheers!
Karen xo

Crazy Crafters January Blog Hop – 2015 Occasions Catalogue & Sale-a-bration

$
0
0

Crazy Crafters Blog Hop Header

Hi All!

Welcome to this month’s Crazy Crafters Blog Hop!

This month we’re celebrating the release of the 2015 Occasions & Sale-a-brations Catalogues.

If you haven’t seen them already, and you don’t have a demonstrator, please feel free to contact me and I’ll send you both catalogues in the mail.  Or you can click on the links in the right hand side tool bar, and visit them online!  If you’re anything like me, you’ll be impatient and want to see them right away.

But first tour our Blog Hop and see what the Crazy Crafters have come up with to showcase the new releases!!!!!

This month I am showing off two creations I have made using items from the new Occasions Catalogue and one of the great Sale-a-brations GIVEAWAYS!!

This card was made by sponging the colours (Strawberry Slush and Daffodil Delight) onto the new Irresistibly Yours freebie papers from the Sale-a-brations catalogue, adding some basic pearls, and the mini accents punch for the flowers. Inside, I used the same paper and just sponged the edges with the Strawberry Slush and Daffodil Delight -just to add some colour and used the clear embossing powder with the Strawberry Slush classic ink – a hint I picked up from a video with Shelli Gardner and Dawn (from Dawn’s  Stamping Thoughts) – and it worked!!!

You’ll find a list of all the products used to make this card, below.

I also made a card for newlywed’s using the new For the New Two, Something Lacy, and Petal Potpourri stamps that are all new releases in the 2015 Occasions Catalogue.

The pic isn’t the best – the colour is Soft Sky on Whisper White cardstock, but it looks a bit murky in this pic.

I stamped the Something Lacey stamp in versamark ink on the whisper white, then covered it with embossing powder and heatset it.  I also stamped two flowers onto scrap whisper white cardstock with versamark ink, embossing powder was then poured and heat set, before punching out with the Flower Medallion Punch.  I cut each flower in two, then used them as a border beneath to greeting.  The greeting was stamped using the Soft Sky classic ink, embossing powder was quickly poured on, and it too, was heat set.  LOVE THIS!!!!  Lastly, I added the basic pearls and the card was done.

Anyway, hope you like. :)

For the New Two

Well they are my two cards showcasing the new products, please follow the link below to view the next Crazy Crafter’s design – and enjoy the ride!!!

Crazy Crafters Next Blog Link


Irresistibly Yours Birthday Card Supplies

Built for Free Using: My Stampin Blog

For the New Two Wedding Card Supplies


Built for Free Using: My Stampin Blog


Eastern Elegance Birthday Card

$
0
0

Hi All!

I have just completed my second video tutorial – this one is part of a new theme – Make it Basic – aimed at those just getting in to card making and crafting.

eastern elegance front

As you can see, its a basic card, using the Eastern Elegance Designer Series Paper from the Stampin’ Up! designer series range of papers.

Beautiful Coastal Cabana, Smoky Slate and Whisper White colours.

An easy card for beginners to put together.

The following are the dimensions for the card, as mentioned in the video.


Paper Dimensions:eastern elegance inside

5 6/8″ x 8 1/2″ Whisper White cardstock creased and folded at 4 1/8″.

5 1/2″ x 3 7/8″ Coastal Cabana cardstock

5 2/8″ x 3 5/8″ Eastern Elegance DSP

5 2/8″ x 3 5/8″ Whisper White cardstock

1 1/2″ x 3 5/8″ Eastern Elegance DSP

Scrap of Whisper White for stamping

Below is a complete list of materials used. :)


The video can be found here:

Or you can watch it on Youtube here!


Make it Basic #2 – Unisex Birthday Card

$
0
0

Hi All!

As I type this, the latest video is currently uploading.  Gee they take F O R E V E R!!!

I must say thank you to my son Rob for the help he had given me the last couple of days, with trying to get the video’s to look at least competent by the end of production.

Unisex Birthday CardToday’s video is part two in the Make it Basic card tutorial series.  Aimed at the new crafter, I’m trying to make the cards as easy as possible for new cardmakers to follow – so I hope I’m being successful??

Today’s card is a unisex birthday card in Wisteria Wonder and Coastal Cabana  colours.  I love this particular colour of blue and though Wisteria Wonder isn’t my favourite colour in the Stampin’ Up! range, they do go together quite nicely.

This card also features another pattern in the Irresistibly Yours DSP pack – free in the Sale-a-brations catalogue, with a $90 or more order from the new Occasions catalogue.

This one, as you can see from the image, is a Horizontal Stripe pattern that stands out really well against the two colours I used.

Materials & Measurements Used:

8 x 5.5″ (20.3 x14 cm) Whisper White Cardstock (scored at 4″  (10cm) and folded in half)
3 3/4 x 5 1/4″ (9.5 x 13.3 cm) Coastal Cabana cardstock
3 1/2 x 5″ (8.8 x 12.7 cm) Irresistibly Yours striped paper
3 1/2 x 2″ (8.8 x 5 cm) Whisper White cardstock
1 1/4 x 2″ (3.2 x 5 cm) Patterned paper (I used the coastal cabana hexagonal paper from the Eastern Elegance DSP)
3 1/2 x 1/2″ (8.8 x 1.5 cm) strip of Wisteria Wonder cardstock
Scrap of Whisper White for stamping & punching
Scrap of Coastal Cabana for punching

I hope you enjoy todays video release.  As always you can find it on my YouTube channel, in the Make it Basic series.

I am hoping to release three video’s a week in this series, with a 3D series coming out soon, too. So please keep an eye out for that one.

Please subscribe to my channel – so you don’t miss any releases.  And please give my video’s a Thumbs Up! so that they will continue to show up in searches for Stampin’ Up! tutorials.

In this video I do tend to blb on a bit, so please forgive me. LOL

The video can be watched on YouTube Here or you can watch from my blog on the video below.

Speak to you soon!
Cheers,
Karen :)


Built for Free Using: My Stampin Blog


Think Ink Challenge

$
0
0


Hi All

Well I’ve had a busy weekend, making video’s as well as accepting a Challenge on our Think Ink team Facebook page with upline Sue Madex.

We had four challenges to meet this weekend, one of the challenges will be shown on video tomorrow afternoon.  It turned out that the challenge inspired me when I was looking for colours and patterns for the sketch I had planned for the Monday Make it Basic video.

Think Ink Team Challenge #3This card was another one of our challenges from a sketch one of the girls put together for us.  All rectangles with a circle added for contrast.

I’ve wanted to try my hand at the current ‘craze’ of shaker cards, and this sketch just screamed out to me ‘shaker card!!!’ opportunity.

I used stamps from three different stamp sets to complete the card and used five different colours, as well as two different punches and a scattering of rhinestones.

Considering this was my first shaker card, I am really pleased with the way it came out.  Hope you like it too!

Cheers,
Karen

Make it Basic #3 – Delicate Flutterby

$
0
0

Hi All!

Who doesn’t love Butterflies?

Delicate Flutterby - Do Lally CraftsThis card is number three in the Make it Basic series of video’s and really, this card couldn’t be easier to make. It’s a two layer card, using two stamp sets, three stamps, four colours and some rhinestones to give it ‘oomph’!

Watch the video (link below) to see just how easy this card is to make.  I love it – and hope you do as well.

Materials & Dimensions:

8 x 5.5″ / 20 x 14 cm whisper white (folded at 4″/10cm)
3 3/4 x 5 1/4″ / 9.5 x 13.5 cm whisper white
scrap whisper white for stamping & punching

You can go to You Tube Here.

Look forward to speaking to you soon!
Cheers,
Karen :)


Built for Free Using: My Stampin Blog


#GDP008 Global Design Project – Case The Designer Challenge

$
0
0

This is my first Global Design Project Challenge, so I decided to kill two birds with one stone, as it were.  I needed a card for my mother in law who has been in hospital for the past month, and needs some cheering up.

I decided to CAS Kylie’s card design, with a slight twist to the layout.

Kylie's Card - #GDP008

Kylie’s Card – #GDP008

The card base is Tip Top Taupe, combined with Cherry on Top DSP and Very Vanilla cardstock for the mats, circles and butterfly.

My CAS of Kylie's Card

My CAS of Kylie’s Card

I stamped the base card with Tip Top Taupe and Mint Macaron butterflies from the Perpetual Birthday Calendar stamp set to create a simple background design that didn’t overwhelm the card.  I cut two pieces of the Cherry on Top DSP 8 x 5 cm each and backed onto Very Vanilla cardstock. Using Kylie’s layout as the base but on a landscape card instead of portrait. I placed the first ‘mat’ down, then a layer of Mint Macaron Dotted Lace Trim, then the second layer of cardstock/paper.

I used the 2 3/8″ scallop circle to punch out some Very Vanilla, and then stamped some Tip Top Taupe with the ‘blurred’ stamp from the Perpetual Birthday Calendar set to give some colour and texture to the scallop.  I cut a 2″ circle from the DSP and layered it on the scallop. Then using the Tip Top Taupe and Mint Macaron I stamped the large Admiral (??) butterfly from the Papillion Pot Pourri stamp set.  To get a two toned effect, I first covered the stamp with Mint Macaron and then ‘circled’ the stamp onto the Tip Top Taupe to ink the edges only. I LOVE the effect!  Mounting the butterfly onto the circle with glue dots and placing a 3 bead ‘string’ of pearls down the centre of the butterfly.

The circular layers were mounted with foam dimensionals, and the sentiment was stamped from the Express Yourself stamp set, and punched with the Word Window punch before being mounted with a glue dot.  Small pearls were set around the scallop and short ‘strings’ decorate the three different paper/card layers.

Well this is the first card I’ve made for a while, so I hope you like it.

Why not visit The Designers over at Global Design Project and enter in this new challenge, “Case The Designer”. You never know what will inspire you!

Until next time!
Cheers,
Karen

The following products were used on this card:

Built for Free Using: My Stampin Blog

#GDP009 – Global Design Project – Colour Challenge

$
0
0

My main reason for entering the #GDP009 challenges is that in my normal, everyday life, I’m busy making wedding, engagement and birthday invitations – you know, mass production – sometimes on quite a large scale.  The same design over and over – ad nauseum.  While I love making these, once the original is made, it can become somewhat stifling to my creativity.

The GDP challenges make me think about being creative.  This weeks challenge was using three of the 2015 – 2017 In Colours from Stampin’ Up!

GDP009-Inspiration

So… with that – here’s my entry for this week:

GDP009-DoLallyCrafts

The photo doesn’t do the colours justice, unfortunately.  I was aiming at something simple this week because of how bright the colours are.

The base card is Mint Macaron – a top folding card, with a mat of Tip Top Taupe on top.

I followed this with matting the Whisper White onto the Watermelon Wonder and adhering with dimensionals to the Tip Top Taupe mat.

Punching out three heart with the Itty Bitty Accents Heart punch, and using the Express Yourself (retired) stamp set – as my craft room is in a state of uproar at present, and I couldn’t find the Thank You stamp I was after amongst the mess. LOL

I added the rhinestones for a bit of bling.

Why not visit The Designers over at Global Design Project

Hope you like this weeks card!

Until next time
Cheers,
Karen :)

Built for Free Using: My Stampin Blog

Finally able to have a play!

$
0
0

It’s been a little while since I’ve been able to have a play with my stamps, inks, punches and dies – but this weekend was it!

I finished the last of the wedding invitations for clients on Thursday, so Friday night I was able to play!!

I haven’t had a chance to make any Christmas cards or send any out. LOL So that was what I played around with this weekend.

Pulled out the heatgun, embossing powder, some whisper white cardstock and some lovely gold and clear washi tapes and gold ink; as well as an array of blues from the Stampin’ Up! range.

Here are the results:

Bright&Beautiful-DoLallyCrafts Christmas Flurries - DoLallyCrafts FlurryBlue-DoLallyCrafts

A set of four of each card was made, so I’m now up a dozen Christmas cards in a couple of hours playing around.  Will hopefully make a couple more sets in the coming nights.  And I’m hoping to compete in a couple more challenges over the coming weeks.

Stay tuned – and Happy Crafting!!

Crazy Crafters and Pootlers Blog Hop

$
0
0

CrazyCrafters-PootlersBlogHopHeader

Hi All!

Welcome to the First Ever Crazy Crafters-Pootlers Blog Hop, where we will be showcasing the new Stampin’ Up! Occasions Catalogue for Spring 2016 and the Sale-a-brations Catalogue.

I have long been a fan of Sam Hammond-Donald – the original Pootle.  I was watching her video’s before I joined Stampin’ Up! and she was in no small way a contributing factor to my eventual joining. (Petra you owe her! LOL)

So when I discovered our team would be joining with hers for a Blog Hop I was TOTALLY EXCITED!!!

I hope you love all the creations you have seen and are about to see from these girls who, through the magic of the internet, can share from two different continents – half a world away from each other.

Well let’s finish with the gushing and get on with the show.

You can find my contribution below.

CrazyCrafters-PootlersBlogHop

I used two different stamp sets for this card –

  1. The fantabulous Number of Years stamp and die set – remember – 15% off when you bundle these together!! and,
  2. The Sale-a-bration stamp set – What I Love

I did something different with the three-step stamp from What I Love in that the first two stamping where done with the Watermelon Wonder, and the final border stamp was done with Versamark and then gold embossed.  I thought this was quite effective, adding a splash of elegance to the card.

love the {AGAIN} from the Number of Years set. My husband’s uncle has never had a birthday over 29! So this stamp will be used a LOT!!!

Thanks for dropping by, please feel free to share our blog hop amongst your friends!!

Ciao!
Karen :)

You’ll find the previous and next blog post’s by following the link below:

Justyna Cieslinska - Perfect Crafts                   Next to Sam Hammond Donald - Pootle!!


Built for Free Using: My Stampin Blog

Happy New Year from Downunder!

$
0
0

Hi All!

Happy New YearWelcome to the new year here at Do Lally Crafts!  I am hoping to post more frequently this year than I have previously – no, not a NY resolution, but a promise I sort of made to myself.  So *fingers crossed*, here’s hoping.

Between playing with papers and stuff, I had a craving for some scones, hence the picture here. LOL

Jealous???

A very easy recipe for those who are interested.

Quick and Easy Scones

300ml thickened cream
375ml can of lemonade
4 cups of sr flour

  • Mix them all together, dump out onto a floured bench and pat down – using extra sr flour if the mixture is sticky to the touch.
  • Using either a scone cutter or sharp knife, cut into the dough, then place the raw scones onto some baking paper on an oven tray.
  • Bake for 15 — 20 mins, at 200C.
  • Remove from oven and allow to cool for 5 mins, before topping with your favourite jam and cream.
  • Enjoy!!
  • My mixture provided 14 HUGE scones!!

Okay, enough with the munchies!!

We only have two days to go, here in Australia, until the New Occasions Catalogue and Sale-a-bration Catalogues are released to the general public – excited much? I am, because I know what is coming up!!!

Can’t wait to show you some great new stamp and die sets that are being released as well as some new punch sets.

There are a few bundles included in the new Catalogue – which are BRILLIANT!!!  I managed to get my hands on some back in December and have been playing with a few – so be prepared to see some of my latest creations.

If you’d like to receive a hand copy of the new catalogues – shoot me a message via the Contact page! If you live in the Mornington area, I can hand deliver them, or if you’re farther afield I can post them off to you!!

Have a GREAT New Year everyone!  I look forward to sharing my creations with you over 2016, and hope you stick around to see them.

Cheers!
Karen


Grateful Bunch Stamp Set – 2016 Occasions Catty

$
0
0

Hi All!

awesomeWelcome to my first creation for 2016.

This card was created using the new Grateful Bunch stamp set and matching punch – you can bundle these for a saving of 15% during the new Occasions Catalogue sale. 5th Jan – 31st March 2016.

I’m a sucker for flower stamp sets, dies, punches.  If there’s a bundle to be bought, I’ll usually be right there! LOL

This card used a number of summery colours, I wanted a nice warm ‘smiley’ type card, and with the added bling of rhinestones, I was really pleased with how this card came out.

The You are totally awesome stamp used here has a matching stamp inside the card and I am totally grateful.

The centre of the largest flower is the 2015 – 2017 In Colour Blossom Accents.

Hope you like it as much as I do!?

Have a browse through our new Occasions and SAB Catalogues!! (New release today 5th January!!)

Cheers,
Karen

Built for Free Using: My Stampin Blog

Lotus Blossom Sympathy Card

$
0
0

card-for-sueSympathy cards are always a hard creation to come up with.

This card didn’t come out as I originally planned, but it is close, and worth a share.

It was made using the Lotus Blossom stamp set from Stampin’ Up!. and using two of the new in colours for 2015 – 2017. Tip Top Taupe and Mint Macaron.

The use of the basic pearls gave it a softer look than rhinestones would have, I hope you like it.

Check out the new releases from our 2016 Occasions and Sale-a-bration Catalogues!!


Built for Free Using: My Stampin Blog


Birthday Bouquet DSP and Perfect Pairings Stamp Set (SAB)

$
0
0

tytytysmHi All!

When I first started making cards, I barely used any stamps.  It was all papers, rub-ons, stickers, ribbons and rhinestones.  I’ve found over the last couple of years tho, I have rarely used designer papers to create cards, using more stamps to create my own backgrounds, but I think that’s about to change – again.

I put this card together using the Birthday Bouquet paper from the new Occasions Catalogue – and honestly – I LOVE IT!!  I have gone back to my roots as far as this card goes.

There’s ribbon, paper, rhinestones, that little flower – and a couple of stamps.


I have made a pledge to myself – yes, another one!  I am going to go through my stash and start using some of the older papers I have been hoarding – not just to clear out the stash – but also to see what other goodies I bought and then forgot about.

Feel free to share your own ‘older’ papers in the comments section!

Check out the new Occasions and Sale-a-bration Catalogues!!

Cheers,
Karen

Built for Free Using: My Stampin Blog

Christmas Past…

$
0
0

I know Christmas has come and gone but with the hectic frenzy that came with the season, I just didn’t get a chance to post some of my ‘makes’. LOL

I was busy making little cards and gifts for hubby to take in to the dialysis nurses who look after him, as well as a couple of little ‘gifties’ for an elderly neighbour and her daughter. Between organising Christmas lunch for the family and grandparents.

snowboxes

Little Tic Tac booklets for the nurses

top-tic-tac-bags

These little bags held the tic tac boxes :)

tic-tac bags

Front of the little bags, with snowflake decorations

redstar

Multiple cards for the nurses and some of hubbys patient-friends

choc-top-sides

Little Chocolate Favours – these boxes hold four mini bars of chocolate (Side View)

choch-top-sq

Top View of the Chocolate Boxes

choc-box-top

Close up of the decorations on top using the snowflake double punch

I was rather slammed over the Christmas period with my small home business, making wedding, save the date and anniversary invitations for clients, so I didn’t get as many Christmas cards made as I would have liked.

I hope you all had a great Christmas!!


Our new catalogues were released on Tuesday 5th January and run until 31st March. Have a browse and then click on the Shop Now link to make your purchases!


#GDP017 – Colour Challenge

$
0
0

This week’s #GDP (Global Design Project) is a colour challenge put forward by Brian King.

His colours were:

Global Design Project 017

But since I don’t actually have those colours, I decided on some similar colours, using the new In Colour 2015 – 2017 selection of Tip Top Taupe and Watermelon Wonder, paired with Pear Pizzazz.  So the same colur families, just different hues.

I also CASE’d the 9th December 2015 Succeed Weekly email sample: I loved the sample and it was something a bit out of the box for me. (To receive the Succeed Weekly email – Join Stampin’ Up!)

Succeed Weekly Email


Okay, here’s my submission for this weeks challenge!

#GDP017Challenge- DoLallyCrafts

Three stamp sets were used to make this card, Number of Years, Perfect Pairings (SAB Freebie) and Balloon Celebration.

Unfortunately my phone’s lense has cracked so I apologise for the bad picture.  Must put that on the ‘to-do’ list!

Enjoy the rest of the submissions in this challenge, and don’t forget – the new catalogues have been released by Stampin’ Up!  Contact me if you’d like a hard copy.

Caio!
Karen :)


Our new catalogues were released on Tuesday 5th January and run until 31st March. Have a browse and then click on the Shop Now link to make your purchases!


Built for Free Using: My Stampin Blog

Viewing all 187 articles
Browse latest View live


Latest Images